


Unforgettable Vows on a Budget in Melbourne’s Best Spaces
Planning a wedding in Melbourne can feel overwhelming because of the city’s reputation for vibrant events and stylish celebrations. From iconic city skyline views to lush park greens and heritage buildings, couples have a wealth of venue options.
Yet with rising costs for weddings across Australia, many couples worry that a dream venue must come with a prohibitive price tag. With thoughtful research and a bit of flexibility, it’s possible to secure a beautiful space that reflects your vision without pushing your budget beyond comfort.
Choosing the right setting for your big day involves balancing your aesthetic goals with practical considerations like guest count, catering costs and seasonal demand. The diversity of Melbourne means that you can find inner‑city industrial chic, riverside charm, heritage gardens and even relaxed barn‑style venues that all offer excellent value.
Whether you imagine a grand reception or a cosy gathering with close family and friends, the city and its surrounds have options to suit.
Affordable wedding venues Melbourne offer couples the chance to celebrate in spaces that feel personal and special yet don’t demand the premium prices often associated with wedding planning. These venues range from elegant restaurants and historic halls to outdoor gardens and adaptive urban spaces.
By considering off‑peak dates, flexible catering and alternative spaces like community halls, many couples are discovering that affordability doesn’t equate to compromise.
This guide explores a selection of these cost‑conscious venues across Melbourne and nearby regions to help you make an informed decision for your celebration. It provides insight into what makes each option stand out so that you can focus on what truly matters: celebrating your union surrounded by loved ones.
Riverside and Garden Settings for Romantic Celebrations
Fairfield Boathouse
Fairfield Boathouse sits beside the tranquil Yarra River, presenting a gorgeous riverside setting for couples seeking natural beauty without extravagance. The venue blends indoor and outdoor areas, allowing ceremonies on the deck with dinner inside or alfresco receptions under the open sky.
With lush greenery framing photos and affordable catering packages featuring local, seasonal foods, it’s ideal for couples who want a relaxed, scenic wedding day. The blend of rustic timber architecture and water views creates an inviting atmosphere that feels both romantic and uninterrupted by city noise.
Collingwood Children’s Farm
For a country‑style wedding in an urban area, Collingwood Children’s Farm is a delightful find. Set on sprawling grounds that include paddocks, barns and shady gum trees this venue brings rustic charm just minutes from central Melbourne. It caters well to larger guest lists while retaining a sense of openness and simplicity.
Many couples appreciate the flexibility here such as bringing in food trucks, grazing tables or DIY elements to keep costs down and create a day that is uniquely theirs.
The Gardens House at Royal Botanic Gardens
Nestled within one of Melbourne’s most iconic green spaces The Gardens House offers an elegant, small‑scale venue perfect for garden weddings. This historic homestead surrounded by lush lawns and mature trees is suited to intimate gatherings and garden soiree settings. The picturesque location also offers abundant photo opportunities, making the natural surroundings a major part of the wedding’s charm.
Urban Chic and Warehouse‑Style Spaces
The Wool Mill Brunswick
Industrial design lovers often turn to The Wool Mill in Brunswick, a restored warehouse that brings modern minimalism and flexibility to wedding planning. With polished concrete floors high ceilings and natural light flooding the interior this space offers a contemporary backdrop that requires minimal décor to shine. Exclusive use of the venue allows seamless transitions from ceremony to reception without additional transport or setup hassles.
Two Ton Max
Located in North Melbourne’s creative heart Two Ton Max merges industrial aesthetics with personality. This warehouse‑style venue brings exposed beams high ceilings and a private courtyard that can be styled to suit a range of wedding themes.
Its adaptable nature makes it popular with couples who want control over layout and vibe without a high hire cost. The space can accommodate both formal sit‑down dinners and casual celebrations with grazing tables and open bars.
Little Henri Thornbury
Little Henri in Thornbury is a café that has transformed into an intimate wedding venue celebrated for its relaxed atmosphere and stylish interior. Ideal for smaller guest lists this space combines rustic accents like exposed brick with warm lighting and a courtyard perfect for cocktail‑style receptions or evening dinner parties. Catering is flexible with high‑quality options that suit a range of budgets and menus.
Heritage and Unique Venues Offering Character
Quat Quatta
Quat Quatta is a classic Victorian mansion that balances heritage elegance with surprisingly accessible pricing. Couples can enjoy ornate interiors ceremony lawns and a charming courtyard fountain. With packages generally more affordable than many heritage estates, it allows couples to host wedding celebrations that feel grand yet grounded in local history.
Jardin Tan
Slightly outside the typical city centre offerings Jardin Tan stands out for its blend of stylish interiors and customisable wedding packages. Originating as a French‑Indochina influenced venue this glasshouse restaurant provides a light‑filled and elegant space for weddings with pricing that often starts below many traditional venues. Its location near the CBD makes it a strategic choice for couples who want a distinctive venue without a premium cost burden.
Community Halls and Council Spaces
Melbourne and surrounding suburbs host numerous community‑run halls and council event spaces that are excellent for brides and grooms looking to allocate more of their budget to catering, music or décor. These halls range from historic timber‑floored heritage sites to simple multi‑purpose venues that can be transformed to fit your theme.
Because many of these spaces have lower hire fees and fewer restrictions they are increasingly popular for DIY weddings and alternative celebrations.
Suburban and Perimeter Venues with Value
Rombe Rooftop
Located in Burwood East Rombe Rooftop brings together lush rooftop greenery and urban convenience. The terrace and indoor space flood with natural light making it suitable for both daytime ceremonies and evening receptions. As an attractive, mid‑priced option it’s suited to couples who want something a little elevated without dramatically increasing cost.
Harbour Room St Kilda
Harbour Room in St Kilda offers expansive waterfront views of Port Phillip Bay and the city skyline. With versatile indoor and outdoor ceremony areas it’s a great choice for larger celebrations. Pricing per head here can be competitive compared with inner city banquet halls but offers exceptional visual value thanks to the setting.
Moon Dog Doglands Docklands
Moon Dog Doglands flips the traditional wedding concept on its head with a bold, fun and flexible space ideal for larger and more casual celebrations. Its expansive layout allows room for a big guest list without typical ballroom pricing, and it’s often chosen by couples who want a lively reception in a venue that reflects a laid‑back yet intentional personality.
Planning Tips for Budget‑Focused Couples
Choose Off‑Peak Dates and Times
Selecting a weekday, Sunday, or off‑season date can significantly reduce venue costs. Many Melbourne venues offer lower minimum spends or discounted per‑head pricing for non‑prime times. This approach frees up more of your budget for décor or catering without sacrificing your choice of location.
Consider Flexible Catering and Layouts
Some venues allow you to bring in external caterers or provide BYO options which can create room to tailor your own food and beverage arrangements. This is especially helpful when working with friends and family vendors or aiming for a particular cultural menu that standard packages do not include.
Small Guest Lists and Intimate Ceremonies
Intimate weddings with fewer guests often reduce overall venue costs since pricing is frequently based on per‑head charges. Smaller venues, cafés and community spaces can become surprisingly affordable when used for combined ceremony and reception celebrations.
Frequently Asked Questions
What counts as an affordable wedding venue in Melbourne?
An affordable wedding venue typically offers competitive hire rates, flexible catering options and transparent price structures that help couples stay within budget. This can include community halls, warehouses, restaurants and outdoor spaces that avoid premium banquet pricing.
How can I reduce wedding venue costs further?
You can reduce costs by choosing non‑peak times, holding both ceremony and reception in one location, using simpler décor and negotiating with venues for flexible packages that suit your priorities. Doing so allows you to allocate more budget to what matters most.
Are Melbourne outdoor venues more budget‑friendly?
Outdoor venues like gardens, parks and riverside settings often have lower hire fees compared to traditional ballrooms. However permits and weather contingencies should be considered in your planning.
Conclusion
Melbourne’s vibrant wedding scene doesn’t have to be synonymous with high costs. From leafy riverside locations and heritage properties to industrial‑chic warehouses and rooftop gardens there are affordable wedding venues in Melbourne that cater to diverse tastes and budgets.
By understanding your priorities and embracing flexibility in dates, layouts and catering options, you can secure a venue that aligns with your vision without overspending. Whether you choose a rustic farm setting, an elegant garden house, or a lively urban space each venue offers a unique backdrop to begin your married life together.
Crafting Memorable Debuts: Exploring Product Launch Possibilities in Yarra Valley
A product launch is more than a business milestone; it is an immersive experience that defines how a brand is perceived from the very first moment. Choosing the right venue can transform a standard unveiling into an event that captivates audiences and reinforces the essence of the product. The environment, layout, and amenities collectively influence the success of a launch and the impressions left on attendees.
These venues cater to organisers who value creativity, precision, and the ability to make a strong statement. The mix of indoor sophistication and outdoor charm enables tailored experiences that align with the unique objectives of any product introduction. Whether a brand is presenting a tech innovation, a gourmet offering, or a luxury lifestyle product, Yarra Valley venues provide the infrastructure and ambience to bring the launch vision to life.
Product launch venue Yarra Valley provides an exceptional setting for brands seeking to combine professional functionality with a distinctive atmosphere. Surrounded by rolling hills, vineyards, and natural beauty, these venues offer both versatility and a sense of occasion. They are designed to support a wide range of launch types, from intimate, exclusive reveals to large-scale corporate presentations.
The versatility of these spaces ensures that each event can be structured to maximise audience engagement. From interactive displays to curated hospitality experiences, the environment enhances every element of the launch. For brands seeking a memorable introduction to the market, Yarra Valley offers a combination of style, practicality, and scenic allure that few other locations can match.

Flexible Event Spaces
Transformable Layouts for Launch Needs
Venues in the Yarra Valley are designed to accommodate a range of launch formats. From theatre-style seating for keynote presentations to modular spaces for product demonstrations, the layout can be customised to suit the goals of the event. This flexibility ensures that brands can craft an experience that reflects their identity while engaging guests effectively.
Indoor and Outdoor Options
The ability to combine indoor and outdoor areas allows for dynamic event programming. Elegant indoor spaces provide controlled environments for audiovisual presentations, while outdoor terraces, gardens, and vineyard settings create opportunities for networking, product reveal ceremonies, or interactive installations. This combination allows organisers to deliver a layered, memorable experience.
Advanced Technology Integration
Modern launches often require high-tech support. Yarra Valley venues offer state-of-the-art audio and visual systems, including projection screens, immersive lighting, and connectivity for live streaming. This allows for seamless presentations, product demonstrations, and hybrid events that reach both in-person and virtual audiences.
Types of Product Launches Supported
Luxury and Lifestyle Products
For luxury brands, the ambience of Yarra Valley venues complements the elegance of high-end products. Carefully curated interiors, scenic outdoor areas, and bespoke services create a launch environment that reflects exclusivity and refinement. This is ideal for luxury fashion, premium vehicles, and upscale lifestyle goods.
Technology and Innovation Launches
Tech launches benefit from flexible spaces that accommodate demonstrations, hands-on experiences, and media coverage. Venues in the Yarra Valley offer the necessary infrastructure to showcase innovations through interactive displays, augmented reality setups, or digital presentations. This supports engaging, memorable introductions for new gadgets, software, or smart devices.
Food and Beverage Debuts
Culinary and beverage brands require venues that can provide tasting experiences and sensory engagement. Equipped kitchens, tasting rooms, and alfresco areas allow guests to interact directly with the product. Events can include chef demonstrations, pairing sessions, and immersive experiences that enhance the launch while highlighting product quality and craftsmanship.
Arts and Creative Product Launches
For creative industries, Yarra Valley venues provide adaptable spaces suitable for art exhibitions, design showcases, and lifestyle launches. Modular staging, gallery lighting, and flexible seating arrangements allow organisers to create a visually striking environment that complements artistic expression and supports audience engagement.
Hospitality and Guest Experience
Customised Catering Services
Catering is an integral part of the launch experience. Yarra Valley venues provide bespoke menus that align with brand themes and the event’s narrative. Culinary experiences can be tailored to create lasting impressions through immersive tasting events, thematic dining, and interactive food presentations.
Accommodation and Extended Events
Many venues offer accommodation or partner with nearby lodges to host multi-day launches. This allows for extended workshops, networking opportunities, and guest engagement, ensuring that participants remain connected to the brand and the event experience.
Dedicated Event Support Teams
Professional event coordinators ensure that every detail of the launch runs smoothly. Venue teams manage logistics, technology, and guest experience, enabling organisers to focus on presenting the product and engaging attendees effectively.
Sustainability and Eco-Conscious Launches
Environmentally Responsible Practices
Many venues implement sustainable practices, such as energy-efficient lighting, waste management systems, and eco-friendly materials. Incorporating these practices reflects a brand’s commitment to sustainability and can enhance the perception of the product among environmentally conscious audiences.
Local and Seasonal Sourcing
Catering and event design often highlight local produce and seasonal elements. This approach strengthens the connection to the region, supports local businesses, and creates a distinctive, authentic launch experience.
Customisable Green Initiatives
Venues work with organisers to integrate eco-conscious strategies, from reusable décor to digital communications and carbon offsetting. These options ensure that sustainability is embedded in the launch experience without compromising creativity or impact.
Frequently Asked Questions
What types of product launches are ideal for Yarra Valley venues?
Venues support launches across luxury, technology, culinary, and creative industries with flexible indoor and outdoor spaces.
How many guests can be accommodated?
Depending on layout, venues can host small, exclusive gatherings or larger events with several hundred attendees.
Do venues provide technical support?
Yes, professional audiovisual systems and technical staff are available for live presentations and hybrid events.
Conclusion
Yarra Valley venues offer the versatility, technology, and atmosphere required to support a wide range of product launches. From luxury and lifestyle products to technology innovations and culinary experiences, these venues provide the infrastructure and environment to ensure every launch is impactful and memorable.
With adaptable spaces, expert event support, and sustainable practices, Yarra Valley enables brands to craft immersive experiences that resonate with audiences and amplify the success of their product introductions.
Understanding Where the Biggest Building Costs Begin in a Dual Occupancy Project
Building a home is a significant financial commitment, and when it comes to dual occupancy developments in Melbourne, understanding construction costs becomes even more important. Property owners and investors often focus on the potential benefits of dual occupancy projects, such as increased rental income, better land utilisation, and enhanced property value.
However, before these benefits can be realised, it is essential to understand where the largest expenses occur during the construction process.
One of the most common questions asked by homeowners and developers is, “What is the most expensive part of building a house?” While many people assume there is a single answer, the reality is more complex. The most expensive component can vary depending on the project’s size, location, design, and level of customisation.
In many cases, structural construction, labour, foundations, and interior finishes represent some of the largest portions of the overall budget.
For those considering Dual Occupancy Developments Melbourne, understanding these major cost drivers can help improve budgeting, planning, and decision-making. By knowing where construction dollars are spent, property owners can make informed choices that balance quality, functionality, and financial goals.
This article explores the most expensive aspects of building a house and explains how these costs influence the success of dual occupancy developments.
Understanding the Cost Structure of a House Build
Before identifying the most expensive part of building a house, it is important to understand how construction costs are distributed across a project. Building a home involves numerous stages, each contributing to the final budget. Site preparation, foundations, framing, roofing, plumbing, electrical work, interior finishes, and landscaping all represent separate cost categories.
In a dual occupancy development, costs can become even more complex because two dwellings are being constructed on the same site. While certain expenses may be shared, the need to create two functional residences often increases labour, materials, and planning requirements.
A comprehensive understanding of construction costs provides valuable context when evaluating where the largest expenses typically occur.
Why Construction Costs Vary Between Projects
No two building projects are the same. Differences in land conditions, design complexity, material selections, and local regulations can significantly influence overall costs. Even properties located in the same suburb may have very different construction requirements.
For dual occupancy developments in Melbourne, factors such as block dimensions, access requirements, and council regulations can further impact costs. Understanding these variables helps explain why construction budgets vary from one project to another.
Recognising these differences allows property owners to establish more realistic expectations and avoid unexpected financial surprises.
The Importance of Accurate Budget Planning
Accurate budgeting is one of the most important elements of any successful development project. Without a clear understanding of construction costs, property owners may underestimate expenses and encounter financial difficulties during the build.
Budget planning should consider not only major construction activities but also professional fees, permits, infrastructure requirements, and contingency allowances. A detailed financial plan provides greater confidence and helps ensure the project remains financially sustainable from beginning to end.
Proper budgeting is particularly important for dual occupancy developments because of their increased complexity and scale.
Structural Construction Is Often the Most Expensive Part of Building a House
When examining where the majority of construction funds are spent, structural construction is frequently the largest expense. This stage includes the foundations, framing, walls, roofing, and key structural components that form the skeleton of the home.
The structure provides the strength and stability necessary to support the entire building. Because of its importance, this phase requires significant materials, skilled labour, engineering expertise, and compliance with strict building standards.
In many cases, structural construction represents one of the largest portions of the overall project budget.
Foundations and Groundworks
The foundation is one of the most critical elements of any house. It supports the weight of the structure and ensures long-term stability. The cost of foundations can vary significantly depending on soil conditions, site slope, drainage requirements, and engineering specifications.
For dual occupancy developments, foundation requirements may become more complex due to the larger building footprint and additional structural loads. Challenging site conditions can further increase costs by requiring excavation, retaining walls, or specialised foundation systems.
Investing in quality foundations is essential because structural issues can be extremely expensive to correct after construction is complete.
Framing and Structural Components
The framing stage creates the framework that supports walls, floors, and the roof. Timber and steel are commonly used framing materials, and their cost depends on market conditions, design complexity, and project size.
In dual occupancy developments, framing costs are often substantial because two residences must be constructed simultaneously. Labour requirements are also significant, as skilled tradespeople are needed to ensure structural accuracy and compliance with building codes.
The quality of the framing directly affects the durability and performance of the finished property.
Labour Costs Represent a Major Construction Expense
Labour is another significant contributor to overall construction costs. While materials receive considerable attention during budgeting discussions, skilled labour often represents a substantial percentage of total project expenses.
Building a house requires the involvement of numerous trades, including carpenters, electricians, plumbers, plasterers, tilers, painters, and landscapers. Each trade contributes specialised expertise that is essential for completing the project successfully.
Labour costs have become increasingly important in recent years due to industry demand and workforce shortages.
Skilled Trades and Specialist Services
Modern construction projects rely heavily on skilled tradespeople. Their knowledge and experience ensure that work is completed safely, efficiently, and according to required standards.
For dual occupancy developments, labour requirements can be even greater because multiple dwellings must be built simultaneously. Coordinating various trades and maintaining quality standards across both residences contributes to increased labour costs.
The value of skilled workmanship should not be underestimated, as it directly influences the quality and longevity of the finished property.
The Impact of Labour Shortages
Labour shortages within the construction industry can significantly affect project costs and timelines. Increased demand for qualified tradespeople often leads to higher wages and reduced availability.
Property owners may experience longer construction schedules and increased expenses when skilled workers are difficult to secure. This challenge has become increasingly relevant in many regions experiencing strong construction activity.
Planning and working with experienced builders can help mitigate some of these labour-related challenges.
Interior Finishes Can Dramatically Influence the Budget
While structural construction forms the foundation of a home, interior finishes often account for a substantial portion of the overall budget. The choices made regarding flooring, cabinetry, benchtops, fixtures, and fittings can significantly influence project costs.
Many homeowners underestimate the financial impact of finish selections because individual items may appear relatively inexpensive when considered separately. However, these costs accumulate quickly throughout the property.
For dual occupancy developments, interior finish costs are effectively multiplied because two residences require kitchens, bathrooms, flooring, and other essential features.
Kitchens as a High-Cost Area
The kitchen is frequently one of the most expensive rooms in a house. Cabinetry, appliances, benchtops, plumbing fixtures, and electrical installations all contribute to its cost.
In dual occupancy developments, two kitchens must often be completed, increasing the overall budget considerably. Premium materials and custom designs can further elevate expenses.
Because kitchens play a major role in property appeal and functionality, many developers choose to invest heavily in this area despite the higher costs.
Bathrooms and Wet Areas
Bathrooms represent another major construction expense due to the combination of plumbing, waterproofing, tiling, fixtures, and cabinetry required. The complexity of these spaces often results in higher labour and material costs.
Dual occupancy developments may include multiple bathrooms across both dwellings, further increasing expenses. High-end finishes and specialised fittings can significantly influence final costs.
Quality bathroom construction is essential because repairs involving waterproofing or plumbing can be costly and disruptive.
Site Conditions Can Increase Building Costs Significantly
The condition of the building site plays an important role in determining construction costs. Even before building begins, certain site characteristics may require additional work that increases the overall budget.
Site preparation is often overlooked during early planning stages, but it can have a substantial impact on project feasibility. Understanding these potential costs helps property owners prepare more effectively.
Site-related expenses can vary dramatically depending on the property’s characteristics.
Sloping Blocks and Difficult Terrain
Building on sloping land often requires excavation, retaining walls, and specialised engineering solutions. These requirements can add high costs to the project before construction even begins.
Dual occupancy developments on challenging sites may require additional planning and design adjustments to accommodate topographical constraints. These factors can influence both construction costs and project timelines.
Careful site assessment is essential for identifying potential challenges early in the planning process.
Soil Conditions and Foundation Requirements
Different soil types present different construction challenges. Reactive clay soils, unstable ground, or poor drainage conditions may require specialised foundation systems and additional engineering measures.
These requirements increase both material and labour costs while contributing to longer construction timeframes. Soil testing is, therefore, an important step in understanding potential site-related expenses.
Addressing soil issues properly helps ensure long-term structural stability and performance.
The Role of Design Complexity in Construction Costs
Design choices have a direct impact on construction costs. While visually impressive homes may offer strong market appeal, architectural complexity often comes with increased expenses.
Understanding how design decisions influence the budget can help property owners strike a balance between aesthetics and affordability. Thoughtful planning can achieve attractive results without unnecessary cost escalation.
For dual occupancy developments, efficient design is particularly important because expenses affect multiple dwellings.
Custom Architectural Features
Custom features such as curved walls, extensive glazing, intricate rooflines, and unique structural elements often require specialised materials and labour. These features can significantly increase construction costs compared to standard designs.
While custom architecture can enhance visual appeal, property owners should evaluate whether the benefits justify the additional expense. Careful consideration helps ensure that design choices align with project objectives.
Balancing creativity with practicality often leads to better financial outcomes.
Efficient Design and Cost Management
Well-planned designs can improve functionality while controlling costs. Efficient layouts reduce wasted space and simplify construction processes without sacrificing comfort or aesthetics.
Experienced designers and builders understand how to create attractive homes that maximise value while minimising unnecessary expenses. This approach is particularly beneficial for dual occupancy developments where cost efficiency is a key consideration.
Thoughtful design contributes to both affordability and long-term usability.
How Dual Occupancy Developments Affect Building Costs
Dual occupancy projects present unique financial considerations because they involve constructing two dwellings on a single site. While certain costs may be shared, others increase due to the additional building requirements.
Understanding how dual occupancy developments influence construction expenses helps property owners evaluate potential returns and risks. Accurate cost forecasting is essential for making informed investment decisions.
The financial dynamics of dual occupancy developments differ significantly from those of single-home builds.
Shared Infrastructure Opportunities
Some infrastructure costs may be shared between dwellings, creating opportunities for cost efficiencies. Site preparation, certain utility connections, and access arrangements may benefit from economies of scale.
These shared elements can help improve overall project viability and enhance financial performance. However, not all expenses are reduced simply because two homes are being built.
Careful planning is necessary to maximise these potential efficiencies.
Increased Construction Scope
Although some costs can be shared, dual occupancy developments involve building two complete residences. This naturally increases material requirements, labour demands, and overall project complexity.
Property owners should be prepared for a larger investment compared to a standard single-home construction project. Understanding the increased scope helps establish realistic budgets and expectations.
Comprehensive financial planning is essential for successful dual occupancy development.
Frequently Asked Questions
What is the most expensive part of building a house?
Structural construction is often the most expensive part of building a house. Foundations, framing, roofing, and key structural elements typically represent a large portion of the overall budget.
Do interior finishes significantly affect building costs?
Yes. Kitchens, bathrooms, flooring, cabinetry, and fixtures can substantially increase construction costs, particularly when premium materials and custom designs are selected.
Are dual-occupancy developments more expensive than building one house?
Generally, yes. While some infrastructure costs may be shared, constructing two dwellings requires additional materials, labour, and planning, resulting in a higher overall investment.
Conclusion
Understanding the most expensive part of building a house is essential for anyone considering a residential construction project, particularly those involved in dual occupancy developments in Melbourne. While structural construction often represents the largest expense, labour, interior finishes, site preparation, and design complexity also contribute significantly to the overall budget.
For property owners and investors, recognising these cost drivers provides valuable insight into project planning and financial management. By working with experienced professionals, conducting thorough site assessments, and making informed design choices, developers can better manage expenses while achieving high-quality outcomes.
Successful dual occupancy developments rely on careful planning, realistic budgeting, and a clear understanding of where construction dollars are most heavily invested.
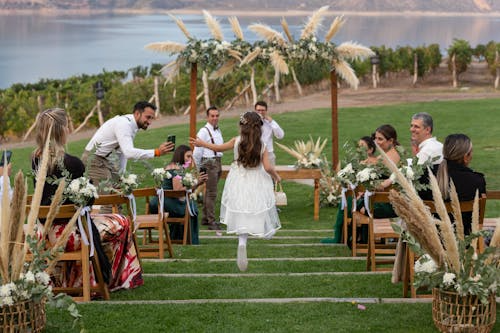
Golden Light and Vine Covered Nights for a Yarra Valley Wedding Reception
Soft sunlight across the vines, crisp evening air, and rolling landscapes make the Yarra Valley one of the most sought-after settings for a wedding celebration. Every season brings a different atmosphere to an outdoor reception, shaping everything from floral styling to guest comfort and photography. Choosing the right time of year can completely transform the experience and create the exact mood couples imagine for their special day.
Many couples are drawn to outdoor celebrations because they offer a natural sense of romance that indoor venues cannot easily recreate. The changing scenery throughout the year means no two receptions ever feel the same. Warm sunsets in summer, colourful foliage in autumn, fresh greenery in spring, and cosy winter charm all create unique opportunities for unforgettable moments.
Outdoor wedding reception Yarra Valley celebrations are especially popular because the region delivers a balance of picturesque landscapes and seasonal beauty. Vineyards, gardens, and open-air spaces provide a naturally elegant backdrop that changes dramatically throughout the year. The season couples choose often depends on the atmosphere they want their reception to reflect.
While every season has its own appeal, understanding how weather, lighting, guest comfort, and venue styling differ throughout the year helps couples make a more confident decision. Timing an outdoor reception carefully can elevate the entire celebration and ensure the setting feels effortless from the ceremony through to the final dance.
Spring Creates Fresh and Romantic Reception Settings

Blossoming Vineyards Bring Natural Elegance
Spring introduces vibrant greenery and blooming flowers across the Yarra Valley, making outdoor receptions feel fresh and lively. Gardens begin to flourish, and vineyard landscapes regain their rich colour after cooler months. This natural transformation creates a soft romantic atmosphere that suits elegant receptions and garden-inspired styling.
The abundance of seasonal flowers during spring also gives couples more flexibility with floral arrangements. Fresh blooms blend seamlessly with the surroundings, reducing the need for excessive decorative elements. Reception tables often feel naturally refined because the scenery already contributes visual beauty.
Comfortable Temperatures Encourage Outdoor Dining
One of the biggest advantages of spring receptions is the comfortable climate. Mild afternoons and cooler evenings create pleasant conditions for outdoor dining and dancing. Guests can enjoy the scenery without the intense heat that can sometimes affect warmer months.
The moderate weather also allows couples to experiment with various reception layouts. Long banquet tables beneath festoon lighting or open-air cocktail areas become more enjoyable when temperatures remain balanced throughout the evening.
Spring Sunlight Enhances Wedding Photography
Photographers often appreciate spring weddings because the lighting is soft and flattering. The gentler sunlight helps create glowing portraits without harsh shadows or excessive brightness. Vineyards and gardens appear especially vibrant during this season, adding depth and colour to reception photography.
Golden hour during spring tends to provide dreamy conditions for outdoor images. Couples who value natural photography often find spring particularly appealing because the environment looks fresh and alive in every frame.
Seasonal Weather Requires Flexible Planning
Although spring offers beauty and mild temperatures, the weather can occasionally become unpredictable. Light rain showers and sudden temperature shifts are still possible. Couples planning outdoor receptions during this season should consider covered areas or adaptable venue spaces.
Many venues in the Yarra Valley are experienced in handling changing spring conditions. Marquees, sheltered terraces, and indoor alternatives help ensure the celebration continues smoothly even if the weather changes unexpectedly.
Summer Delivers Long Evenings and Vibrant Celebrations
Extended Daylight Supports Relaxed Timelines
Summer is often associated with lively outdoor receptions because the longer daylight hours allow celebrations to flow naturally from afternoon ceremonies into evening festivities. Couples can enjoy more time outdoors without feeling rushed by early sunsets.
The extended daylight also creates opportunities for multiple reception experiences. Guests may begin with outdoor canapés among the vines before transitioning into dinner and dancing under illuminated skies later in the evening.
Warm Nights Create a Festive Atmosphere
Summer evenings encourage energetic celebrations and social interaction. Outdoor dance floors become especially popular during this season because guests are more inclined to remain outside late into the night. The warm weather contributes to a relaxed and celebratory mood that suits larger receptions.
Many couples choose summer because the climate supports alfresco dining without requiring heavy heating or extensive weather preparation. Open-air receptions feel effortless when the evening remains warm and comfortable.
Vineyard Landscapes Look Rich and Mature
The vineyards during summer appear lush and full, creating dramatic scenery for outdoor receptions. Rows of thriving vines and clear skies enhance the visual appeal of both ceremonies and evening dining areas.
Summer sunsets can also create striking reception backdrops. The warm tones of late afternoon light often produce golden landscapes that enhance wedding photography and elevate the atmosphere during dinner service.
Heat Management Becomes Essential
Despite its popularity, summer does require careful planning for guest comfort. Extremely warm days can affect outdoor ceremonies and receptions if shade and hydration are not considered. Couples should ensure guests have access to cool beverages, shaded seating areas, and adequate airflow.
Late afternoon ceremonies are often preferred during summer to avoid the hottest part of the day. Venues with gardens, mature trees, or shaded terraces can make a significant difference in maintaining a comfortable environment for everyone attending.
Autumn Offers Rich Colours and Elegant Reception Styling
Golden Foliage Creates Dramatic Scenery
Autumn is widely admired for its stunning natural colour palette. Vineyards shift into shades of amber, gold, and deep red, giving outdoor receptions a rich and sophisticated atmosphere. Couples looking for warm, romantic aesthetics are often drawn to autumn weddings for this reason.
The dramatic foliage naturally complements elegant styling choices. Candles, textured fabrics, and earthy floral arrangements blend beautifully with the changing landscapes during this season.
Cooler Evenings Encourage Intimate Celebrations
Autumn receptions often feel more intimate because the cooler temperatures encourage cosy dining experiences. Outdoor heaters, fire pits, and warm lighting become part of the atmosphere, creating a welcoming environment for guests.
This season is particularly suited to couples who want their reception to feel refined and relaxed rather than highly energetic. The cooler air encourages longer dinners, meaningful conversations, and slower-paced celebrations.
Seasonal Menus Become More Luxurious
Many reception menus during autumn feature richer seasonal ingredients and comforting dishes. Outdoor dining feels especially memorable when paired with hearty meals and warming beverages. Seasonal produce available during autumn also allows caterers to create menus that reflect the atmosphere of the region.
Wine-focused receptions are particularly appealing during autumn because vineyard settings naturally complement the season. Guests often enjoy the combination of crisp air and warm hospitality.
Unpredictable Evenings Require Preparation
Although autumn is admired for its beauty, evenings can become noticeably colder as the season progresses. Couples planning fully outdoor receptions should ensure heating solutions are available for guest comfort.
Wind can occasionally affect outdoor table styling and décor during autumn as well. Choosing secure decorative elements and practical layouts helps maintain a polished reception environment throughout the evening.
Winter Brings Moody Romance and Cosy Outdoor Experiences
Misty Landscapes Create Cinematic Settings
Winter transforms the Yarra Valley into a moody and atmospheric destination. Morning fog, dramatic skies, and bare vineyard rows create a striking backdrop for couples seeking a more artistic wedding aesthetic.
Outdoor receptions during winter often feel unique because the scenery differs so dramatically from the brighter seasons. The contrast between cool landscapes and warm reception styling creates a memorable visual impact.
Fire Features Add Warmth and Character
Winter receptions often incorporate outdoor fireplaces, heaters, and candlelit settings to create warmth and intimacy. These elements contribute to a cosy atmosphere that many couples find incredibly romantic.
Guests tend to gather closely during winter celebrations, which naturally encourages conversation and connection. Smaller receptions especially benefit from this intimate energy.
Winter Styling Feels Sophisticated and Luxurious
Reception décor during winter often leans towards deeper tones, layered textures, and dramatic lighting. Velvet accents, warm timber details, and candlelit tables enhance the seasonal mood beautifully.
Many couples appreciate how winter allows them to create a reception that feels elegant without relying heavily on floral abundance. Lighting and atmosphere become the main design focus.
Weather Conditions Need Careful Coordination
Winter outdoor receptions require thoughtful preparation because temperatures can drop significantly during the evening. Covered areas, heating arrangements, and weather contingency plans become essential.
Rainfall is also more common during winter, making flexible venue options particularly important. Couples who choose this season usually prioritise atmosphere over guaranteed sunshine and work closely with venues experienced in seasonal planning.
Choosing the Best Season Depends on Your Reception Vision
Romantic Garden Celebrations Suit Spring
Couples who imagine fresh floral styling and bright outdoor settings often gravitate towards spring receptions. The season naturally supports soft colours, elegant gardens, and relaxed outdoor dining experiences.
Spring is ideal for couples wanting a balance between comfortable temperatures and vibrant scenery without the intensity of peak summer heat.
Energetic Outdoor Parties Thrive in Summer
Summer works exceptionally well for couples planning lively celebrations with dancing, cocktails, and extended outdoor festivities. The long evenings create flexibility and allow receptions to continue comfortably under the night sky.
Large guest lists also tend to work well during the summer because outdoor spaces can be used more extensively throughout the event.
Elegant and Intimate Receptions Shine in Autumn
Autumn suits couples seeking warmth, sophistication, and dramatic natural scenery. The rich vineyard colours and cooler temperatures create a refined atmosphere that feels timeless and romantic.
This season also appeals to couples who prioritise food, wine, and candlelit styling as part of the reception experience.
Atmospheric Celebrations Stand Out in Winter
Winter is ideal for couples wanting a reception with mood, texture, and intimacy. Outdoor spaces can still feel magical during colder months when styled thoughtfully with lighting and heating.
Couples drawn to dramatic photography and cosy celebrations often find winter uniquely memorable compared to more traditional wedding seasons.
Frequently Asked Questions
Which season is most popular for an outdoor wedding reception in the Yarra Valley?
Autumn and spring are often considered the most popular seasons because they offer comfortable temperatures and visually stunning vineyard scenery. Many couples prefer these months for their balance of pleasant weather and beautiful natural landscapes.
Is summer too hot for an outdoor reception?
Summer receptions can work beautifully when planned carefully. Late afternoon ceremonies, shaded areas, cooling drinks, and comfortable seating help guests remain relaxed throughout the celebration.
Can outdoor receptions still work during winter?
Yes, winter receptions can feel incredibly romantic with the right planning. Outdoor heaters, fireplaces, covered areas, and warm styling elements create a cosy atmosphere that many couples love.
Conclusion
The best season for an outdoor wedding reception ultimately depends on the atmosphere couples want to create. Every season transforms the Yarra Valley into a different kind of backdrop, offering its own charm, colours, and mood. Some couples are drawn to spring gardens filled with fresh blooms, while others prefer the rich vineyard tones of autumn or the lively warmth of summer evenings.
Outdoor receptions become most memorable when the chosen season aligns naturally with the couple’s vision. From intimate candlelit celebrations to vibrant open-air festivities, the timing of the event shapes the entire guest experience. Understanding how each season influences comfort, photography, styling, and ambience helps couples create a celebration that feels authentic and unforgettable.
Understanding the True Value Behind Affordable Commercial Plastering Services in Melbourne
Every successful commercial property begins with a strong foundation, but it is the finishing touches that ultimately define how a space looks and functions. Whether it is an office building, retail store, restaurant, healthcare facility, educational institution, or warehouse, wall and ceiling finishes contribute significantly to the overall appearance and professionalism of the environment.
Among the many trades involved in commercial construction and renovation, plastering remains one of the most important. It creates smooth surfaces, conceals structural elements, improves durability, and helps transform unfinished spaces into attractive and functional workplaces.
For many Melbourne business owners, property managers, and developers, balancing quality and budget is a constant challenge. Commercial projects often involve significant expenses, making affordability an important consideration. However, when obtaining quotes for plastering work, many clients are surprised by the cost and begin asking an important question: Why are plasterers so expensive?
The answer is more complex than simply looking at labour rates. Professional plastering requires specialised skills, years of experience, physical endurance, technical knowledge, and precision workmanship.
Commercial plasterers must understand building regulations, fire-rating requirements, acoustic systems, moisture control measures, and a wide range of installation techniques. They are responsible for delivering finishes that not only look professional but also meet strict performance standards.
Affordable commercial plastering does not necessarily mean choosing the lowest quote available. Instead, it involves finding experienced professionals who deliver excellent workmanship, reliable service, and long-term value at a competitive price. When viewed from this perspective, plastering costs often reflect the expertise and quality required to achieve successful outcomes.
This article explores Affordable Commercial Plastering Melbourne, explains why plastering services can appear expensive, examines the factors that influence pricing, and highlights how businesses can obtain quality results without compromising their budgets.
Why Commercial Plastering Is a Critical Investment
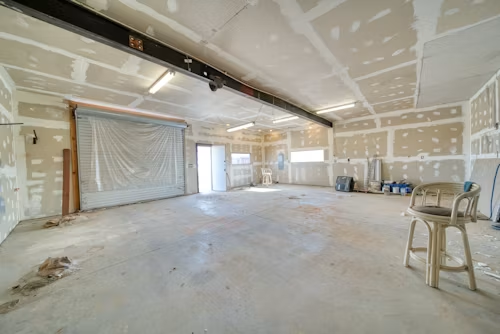
Many people view plastering as a finishing trade that simply improves appearance. While aesthetics are certainly important, commercial plastering serves a much broader purpose.
Walls and ceilings form the visual framework of a commercial property. Smooth surfaces create a professional atmosphere that reflects positively on the business operating within the space. Customers, clients, and employees often notice the quality of interior finishes, even if they do not consciously recognise it.
Plastering also contributes to building performance. Modern systems can improve fire resistance, sound insulation, moisture management, and durability. These benefits help commercial properties remain functional and compliant over time.
Because plastering influences both appearance and performance, it should be considered an investment rather than merely an expense.
Why Are Plasterers So Expensive
This is one of the most common questions asked by commercial property owners.
Skilled Labour Takes Years to Develop
Plastering is a trade that requires extensive hands-on experience. Unlike some tasks that can be learned quickly, achieving professional plastering results often takes years of practice.
Professional plasterers must master surface preparation, plaster application, finishing techniques, joint treatment, ceiling installations, and problem-solving skills. These abilities are developed through training and real-world project experience.
The expertise required to consistently deliver high-quality finishes contributes significantly to labour costs.
Precision Matters in Commercial Projects
Commercial clients expect flawless results.
Small imperfections that might go unnoticed in some environments can become highly visible in offices, retail stores, hotels, and public facilities. Achieving smooth and consistent finishes requires attention to detail and careful workmanship.
This level of precision demands time and skill, which naturally influences pricing.
Physical Demands of the Trade
Plastering is physically demanding work.
Tradespeople often spend long hours lifting materials, working overhead, climbing scaffolding, and maintaining precise movements throughout the day. The physical demands of the profession contribute to the value of skilled labour.
The cost of plastering reflects not only technical expertise but also the effort required to perform the work safely and effectively.
Commercial Projects Involve Additional Complexity
Commercial plastering often requires compliance with strict building standards.
Fire-rated walls, acoustic systems, suspended ceilings, moisture-resistant installations, and accessibility requirements all add complexity to projects. These additional responsibilities require specialised knowledge and increase the level of expertise required.
Understanding Affordable Commercial Plastering
Affordable plastering does not mean sacrificing quality.
Balancing Cost and Value
The cheapest quote is not always the most economical option.
Poor workmanship can result in repairs, delays, maintenance issues, and additional expenses. Affordable plastering focuses on achieving quality outcomes within a reasonable budget.
Businesses benefit most when they receive durable and professional results that minimise future costs.
Efficient Project Planning
Experienced plasterers often provide better value because they work efficiently.
Well-organised projects reduce delays, material waste, and labour inefficiencies. These savings can help keep costs under control.
Appropriate Material Selection
Choosing suitable materials for the project helps balance quality and affordability.
Professional plasterers understand which products offer the best performance for specific commercial environments.
Long-Term Cost Considerations
High-quality plastering typically lasts longer and requires less maintenance.
Considering lifecycle costs rather than initial price alone often reveals the true value of professional services.
Factors That Influence Commercial Plastering Costs
Several factors affect project pricing.
Project Size
Larger projects generally require more labour and materials.
However, economies of scale may reduce costs per square metre in some cases.
Building Design Complexity
Simple wall layouts are generally faster and easier to complete than complex architectural designs.
Curved walls, bulkheads, decorative features, and custom elements increase labour requirements.
Accessibility
Easy access to work areas helps improve efficiency.
Projects requiring scaffolding, elevated work platforms, or restricted access may involve additional costs.
Material Requirements
Specialised products such as fire-rated plasterboard, acoustic systems, or moisture-resistant materials typically cost more than standard options.
These requirements influence overall project budgets.
Common Commercial Plastering Services in Melbourne
Commercial plastering covers a wide range of applications.
Office Fit-Outs
Modern offices rely on plasterboard partitions, suspended ceilings, and smooth wall finishes.
Professional plastering helps create productive and visually appealing workspaces.
Retail Store Construction
Retail environments require attractive interiors that support customer engagement.
Plastering contributes significantly to the overall shopping experience.
Healthcare Facilities
Hospitals, clinics, and medical centres require durable and hygienic wall systems.
Specialised plastering solutions support these requirements.
Educational Buildings
Schools and universities often use plastering systems designed for durability and acoustic performance.
These environments experience heavy daily use.
The Hidden Costs Behind Professional Plastering
Many expenses associated with plastering are not immediately obvious.
Training and Certification
Professional plasterers invest considerable time and money into developing their skills.
Ongoing training helps them stay current with industry standards and building regulations.
Insurance and Compliance
Commercial contractors must carry appropriate insurance and comply with safety requirements.
These obligations contribute to operating costs.
Tools and Equipment
Professional plastering requires specialised tools and equipment.
Maintaining high-quality equipment helps ensure reliable performance and efficient project delivery.
Business Overheads
Contractors manage administrative costs, transportation, fuel, scheduling, and project management responsibilities.
These factors influence pricing structures.
Why Quality Workmanship Saves Money
Choosing quality workmanship often provides financial benefits.
Fewer Repairs
Well-executed plastering reduces the likelihood of cracks, joint failures, and surface defects.
This minimises future repair costs.
Better Appearance for Longer
Professional finishes maintain their appearance over extended periods.
Businesses benefit from reduced maintenance requirements.
Reduced Operational Disruptions
Frequent repairs can interrupt business operations.
High-quality workmanship helps avoid these disruptions.
Stronger Property Presentation
Attractive interiors contribute positively to customer impressions and property value.
Commercial Plastering and Building Compliance
Compliance is a major consideration in commercial construction.
Fire Safety Requirements
Many commercial walls and ceilings must meet specific fire performance standards.
Proper installation helps ensure compliance.
Acoustic Standards
Office buildings, educational facilities, and healthcare environments often require sound-control measures.
Plastering systems contribute significantly to these objectives.
Accessibility Regulations
Wall systems must sometimes accommodate accessibility features and requirements.
Compliance remains an important responsibility.
Quality Assurance
Commercial projects often involve inspections and performance testing.
Professional plasterers understand these expectations.
How to Find Affordable Commercial Plastering in Melbourne
Businesses can take several steps to manage costs effectively.
Obtain Multiple Quotes
Comparing quotations helps establish realistic pricing expectations.
However, decisions should not be based solely on cost.
Review Experience and Reputation
Experienced contractors often provide better long-term value.
Previous project examples can offer valuable insight.
Clarify Project Scope
Clearly defining project requirements helps prevent misunderstandings and unexpected costs.
Accurate planning improves budget management.
Focus on Value Rather Than Price Alone
The most affordable solution is often the one that delivers reliable performance over time.
Commercial Renovations and Plastering Value
Renovation projects frequently involve plastering upgrades.
Modernising Outdated Interiors
Fresh wall and ceiling finishes help revitalise commercial spaces.
Updated interiors improve visual appeal and functionality.
Supporting Business Growth
Renovated environments often align better with evolving operational needs.
Plastering helps create flexible and attractive spaces.
Enhancing Employee Experience
Well-maintained workplaces contribute to comfort and morale.
Employees often appreciate improved surroundings.
Strengthening Customer Perception
Customers tend to associate quality interiors with professional service.
The Role of Technology in Modern Commercial Plastering
Innovation continues shaping the industry.
Advanced Building Materials
Modern products offer improved durability, acoustic performance, and fire resistance.
These materials enhance project outcomes.
Digital Planning Tools
Technology helps improve project coordination and efficiency.
Accurate planning supports cost control.
Sustainable Construction Solutions
Environmentally responsible materials are becoming increasingly popular.
Sustainability influences purchasing decisions.
Improved Installation Techniques
New methods help increase productivity while maintaining quality standards.
Future Trends in Commercial Plastering
The industry continues evolving alongside construction trends.
Demand for Sustainable Buildings
Green construction practices are expected to grow.
Plastering systems will continue adapting to support these goals.
Increased Focus on Workplace Design
Businesses increasingly prioritise employee wellbeing and productivity.
Interior finishes contribute significantly to these objectives.
Smart Building Integration
Commercial spaces are becoming more technologically advanced.
Plastering systems must accommodate modern infrastructure requirements.
Continued Demand for Skilled Trades
Qualified plasterers will remain essential to commercial construction and renovation projects.
Frequently Asked Questions
Why are plasterers so expensive?
Plasterers require specialised skills, extensive experience, technical knowledge, and physical endurance. Commercial projects also involve compliance requirements, advanced materials, and high-quality finish expectations that contribute to overall costs.
Is affordable commercial plastering possible?
Yes. Affordable plastering focuses on achieving excellent value through quality workmanship, efficient project management, and appropriate material selection rather than simply choosing the lowest price.
Should I choose the cheapest plastering quote?
Not necessarily. The cheapest option may result in lower quality work, future repairs, and higher long-term costs. Value and experience should be considered alongside pricing.
Conclusion
Affordable commercial plastering in Melbourne is about achieving the right balance between cost, quality, and long-term performance. While many property owners initially question why plasterers seem expensive, a closer look reveals the expertise, training, precision, and responsibility involved in delivering professional commercial finishes.
Commercial plasterers contribute far more than smooth walls and ceilings. They help create safe, compliant, durable, and visually appealing environments that support business operations and enhance customer experiences. Their work influences everything from first impressions to ongoing maintenance requirements.
Rather than focusing solely on the lowest available price, businesses should consider the overall value provided by experienced professionals. High-quality plastering often reduces future expenses, improves property presentation, and delivers results that stand the test of time. In the long run, investing in skilled commercial plastering is often one of the most cost-effective decisions a business can make when developing or maintaining commercial spaces.
Vines, Vows and Velvet Evenings at a Vineyard Celebration Estate
Love stories deserve a setting that feels timeless, intimate and naturally enchanting. Couples searching for a wedding location often dream of a space that combines elegance with a relaxed atmosphere, creating unforgettable memories for both the newlyweds and their guests. A vineyard estate captures that feeling effortlessly through rolling landscapes, refined architecture and a warm sense of celebration that traditional venues often struggle to replicate.
Modern weddings are no longer focused solely on formal ceremonies and rigid receptions. Couples now want immersive experiences that reflect their personalities and create meaningful moments throughout the day. The atmosphere, scenery and guest experience all play a significant role in shaping the celebration.
A location surrounded by vines and open skies offers a romantic environment that naturally encourages connection, conversation and lasting memories.
Vineyard function venue options continue to attract couples who want sophistication without sacrificing comfort. The combination of scenic views, curated dining experiences and versatile event spaces allows weddings to feel luxurious while remaining welcoming and personal.
Whether hosting an intimate gathering or a grand reception, vineyard estates create a setting that transforms ordinary celebrations into remarkable occasions.
From the ceremony entrance to the final dance of the evening, every detail becomes elevated in a vineyard setting. The natural backdrop enhances photography, the peaceful atmosphere creates emotional depth, and the carefully designed event spaces provide flexibility for different wedding styles.
These qualities make vineyard wedding estates one of the most sought-after choices for couples planning a memorable celebration.
Romantic Landscapes That Create an Unforgettable Atmosphere

Natural scenery brings emotional depth to every ceremony
The visual beauty of a vineyard estate creates an emotional atmosphere that instantly enhances a wedding celebration. Rows of vines stretching across the landscape provide a sense of serenity and elegance that traditional reception halls cannot easily imitate. Guests often feel immersed in the occasion from the moment they arrive because the environment itself contributes to the romance of the day.
Outdoor ceremonies held among vineyards offer stunning views that naturally frame the couple during their vows. The surrounding greenery softens the environment and creates a timeless aesthetic that feels both luxurious and organic. This setting allows couples to enjoy a wedding experience that feels personal rather than overly staged or commercial.
The changing light throughout the day also adds to the venue’s appeal. Afternoon ceremonies glow with warmth while evening receptions become beautifully atmospheric as the sun sets over the vines. This natural transition creates a visually dynamic celebration without requiring excessive decorations or artificial enhancements.
Seasonal beauty transforms the celebration experience
One of the defining qualities of vineyard wedding estates is their ability to evolve throughout the year. Every season brings distinct colours, textures and moods that shape the atmosphere of the wedding. This flexibility allows couples to choose a celebration style that reflects their personalities and preferences.
Spring weddings often feature fresh greenery and blooming surroundings that create a soft and romantic environment. Summer celebrations feel vibrant and lively with golden sunlight illuminating the property throughout the day. Autumn introduces warm, earthy tones that create richness and depth, while cooler weather contributes to a cosy reception atmosphere.
Even during cooler months, vineyard estates maintain their charm through elegant indoor spaces paired with dramatic outdoor scenery. This versatility ensures the venue remains visually appealing regardless of the season while allowing couples to customise their celebration experience according to their vision.
Elegant Reception Spaces Designed for Versatile Celebrations
Indoor and outdoor settings create seamless transitions
A vineyard wedding estate often provides multiple event spaces that allow couples to design a more dynamic and personalised celebration. Many estates include ceremony lawns, terrace areas, reception halls and private lounges that can be used throughout different stages of the event. This variety creates a natural flow that keeps guests engaged and comfortable from beginning to end.
Outdoor cocktail gatherings are particularly popular at vineyard venues because guests can socialise while enjoying panoramic views and fresh air. This relaxed atmosphere encourages conversation and connection before the formal reception begins. Couples can then transition into elegant indoor dining areas that provide warmth, comfort and sophistication during the evening celebration.
The ability to move between spaces also improves the overall event experience. Guests remain entertained and visually stimulated throughout the wedding rather than staying confined to a single room for several hours. This movement contributes to a more memorable and immersive celebration.
Architectural design enhances the visual experience
Many vineyard estates combine rustic character with refined design features that elevate the wedding atmosphere. Exposed timber, stone textures and expansive windows create spaces that feel both luxurious and welcoming. These architectural details contribute to the venue’s charm while complementing the surrounding landscape.
The design of the reception area also influences photography and event styling. Neutral tones and natural materials create a timeless backdrop that works beautifully with different wedding themes. Couples can embrace minimal styling or introduce elaborate decorations without clashing with the venue’s aesthetic.
High ceilings, ambient lighting and open layouts further improve the reception environment. Guests feel comfortable and relaxed while still experiencing an elegant setting suitable for a significant life celebration. This balance between sophistication and warmth is one of the reasons vineyard wedding venues remain highly desirable.
Culinary Experiences That Elevate the Wedding Celebration
Fresh dining experiences leave lasting impressions
Food plays a major role in shaping how guests remember a wedding celebration. Vineyard estates are often known for delivering refined dining experiences that complement the elegance of the setting. Menus are typically designed with attention to freshness, flavour and presentation, creating meals that feel memorable rather than routine.
Many vineyard venues emphasise seasonal ingredients and carefully curated dishes that reflect the atmosphere of the celebration. Guests enjoy meals that feel thoughtfully prepared and connected to the environment surrounding them. This attention to culinary quality contributes significantly to the overall guest experience.
Shared dining experiences also encourage connection among guests. Long tables, relaxed pacing and beautifully presented meals create an atmosphere that feels intimate and celebratory. Couples who prioritise hospitality often appreciate how vineyard venues transform dining into a meaningful part of the event rather than simply a scheduled formality.
Wine pairings create a refined guest experience
One of the distinctive advantages of hosting a wedding at a vineyard estate is the opportunity to incorporate premium wine experiences into the celebration. Carefully selected wines can enhance the dining menu while contributing to the overall sophistication of the event.
Guests often enjoy the connection between the venue and the wine being served because it creates a more authentic and immersive atmosphere. Wine tastings during cocktail hour or thoughtfully paired reception menus add an elevated touch that many couples value when planning their wedding.
The wine experience also becomes part of the venue’s identity and storytelling. Couples can create memorable moments around shared toasts, personalised selections and celebratory dining experiences that feel unique to the setting. These details help distinguish vineyard weddings from more conventional reception venues.
Photography Opportunities That Capture Timeless Memories
Natural lighting enhances every wedding image
Wedding photography is one of the most important elements of any celebration because it preserves memories that last long after the event concludes. Vineyard estates offer exceptional lighting conditions that help photographers capture elegant and emotionally rich images throughout the day.
Soft sunlight filtering across the vines creates flattering natural illumination that enhances portraits and candid moments alike. Open landscapes provide depth and texture while avoiding the harsh artificial lighting commonly found in enclosed venues. These conditions allow photographers to create images that feel cinematic, romantic and timeless.
Sunset photography is especially popular at vineyard wedding estates because the changing colours of the sky create dramatic visual effects. Couples often treasure these moments because they combine intimacy with breathtaking scenery in a way that feels naturally beautiful.
Diverse locations create visual variety
Another major advantage of vineyard wedding venues is the variety of photographic settings available within a single property. Couples can capture formal portraits among the vines, intimate moments near architectural features and candid reception images inside elegant dining spaces.
This diversity allows wedding albums to feel visually dynamic and emotionally layered. Instead of repeating similar backgrounds throughout the collection, photographers can use multiple environments to tell the story of the day more engagingly.
The venue itself often becomes part of the wedding narrative. Scenic pathways, terraces, gardens and rustic structures all contribute character to the images while reflecting the atmosphere of the celebration. This connection between the environment and the couple’s story helps create photographs that remain meaningful for years to come.
Personalised Celebrations That Reflect Individual Style
Flexible styling options support creative wedding visions
Couples increasingly want weddings that feel authentic and reflective of their personalities. Vineyard estates are particularly appealing because they provide a naturally elegant foundation that can accommodate a wide range of wedding styles and creative concepts.
Some couples choose minimalist styling that highlights the beauty of the landscape, while others prefer elaborate floral arrangements and dramatic décor. The neutral and refined nature of vineyard venues allows these creative choices to feel cohesive rather than overwhelming.
This flexibility extends to ceremony layouts, reception arrangements and entertainment options. Couples can host formal seated dinners, relaxed cocktail receptions or intimate gatherings depending on the atmosphere they wish to create. The venue adapts to the celebration rather than forcing couples into a rigid format.
Intimate atmosphere encourages meaningful connection
Large hotel venues can sometimes feel impersonal despite their grandeur. Vineyard wedding estates often create a more intimate environment that encourages genuine interaction and emotional connection among guests.
The peaceful surroundings naturally slow the pace of the event and encourage guests to remain present throughout the celebration. Conversations feel more relaxed, shared meals become more engaging, and the overall atmosphere feels warmer and more personal.
Couples often value this intimacy because it allows them to spend quality time with family and friends rather than feeling rushed through a highly structured schedule. The setting supports meaningful moments and emotional experiences that remain memorable long after the wedding day ends.
Frequently Asked Questions
Why are vineyard wedding venues popular for modern weddings
Vineyard wedding venues combine natural beauty, elegant event spaces and immersive guest experiences in a single location. Couples appreciate the romantic atmosphere, scenic landscapes and flexibility these venues provide for both ceremonies and receptions.
Are vineyard estates suitable for both small and large weddings
Many vineyard estates offer versatile event spaces that can accommodate intimate gatherings as well as larger celebrations. Outdoor ceremony areas, reception halls and private lounges allow couples to customise the event according to their guest numbers and preferred atmosphere.
Do vineyard venues provide good photography opportunities
Vineyard estates are highly regarded for wedding photography because they offer natural lighting, scenic landscapes and multiple visually appealing backdrops. The combination of vineyards, architecture and open spaces creates timeless images throughout the celebration.
Conclusion
A vineyard wedding estate offers far more than a beautiful location. It creates a complete experience shaped by romance, scenery, refined dining and meaningful connection. Every element of the setting contributes to a celebration that feels immersive and memorable from beginning to end.
Couples searching for a wedding venue that combines sophistication with warmth often find vineyard estates especially appealing because they provide elegance without losing a sense of intimacy. The natural surroundings, versatile event spaces and exceptional atmosphere allow weddings to feel both luxurious and deeply personal.
From emotional ceremonies among the vines to candlelit receptions filled with laughter and celebration, vineyard wedding venues continue to define modern wedding experiences through beauty, comfort and timeless charm.
Wedding Celebrations Wrapped in Ease and Elegance
Planning a wedding often begins with excitement and inspiration, yet the process can quickly become overwhelming once decisions start piling up. Venue hire, catering, styling, entertainment, floral arrangements, accommodation, and guest coordination all demand attention at the same time. Couples frequently discover that managing every moving part separately creates unnecessary pressure during what should feel like one of life’s happiest milestones.
Modern celebrations are shifting towards convenience without sacrificing personality or sophistication. Many couples now prefer curated experiences that simplify planning while still allowing room for creativity and meaningful details. This growing preference has led to a stronger demand for seamless wedding solutions that reduce stress and create a polished experience from start to finish.
All-inclusive wedding packages have become increasingly popular because they bring essential services together under one carefully organised arrangement. Instead of contacting multiple suppliers and juggling separate contracts, couples can enjoy a streamlined process where the venue, catering, décor, entertainment, and coordination work together harmoniously.
This approach allows more time to focus on the emotional significance of the celebration rather than administrative complications.
A thoughtfully designed wedding package can transform the planning journey into something far more enjoyable. With experienced professionals handling the finer details, couples gain confidence that every element will flow smoothly on the day itself. The result is a celebration that feels effortless, elegant, and genuinely memorable for everyone involved.
Why Wedding Planning Feels More Relaxed with Complete Packages
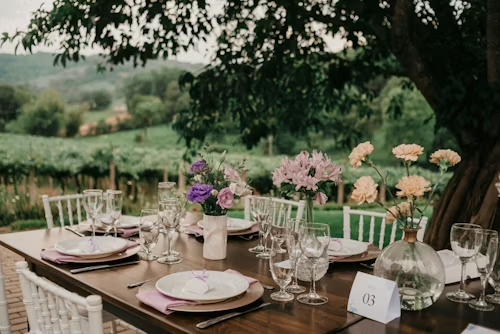
One Coordinated Vision Creates Better Flow
One of the biggest advantages of choosing a complete wedding package is the consistency it brings to the entire event. When separate suppliers operate independently, communication gaps can easily appear. Styling may not align with catering logistics, entertainment schedules can clash with speeches, and setup times may become difficult to manage.
An all-inclusive arrangement removes much of that uncertainty because the services are already designed to work together. The venue team understands the timing of the catering service, decorators know the layout requirements, and coordinators oversee every moving part. This cohesion creates a celebration that feels smooth and professionally managed from beginning to end.
Couples Save Valuable Time During Preparation
Wedding preparation can consume countless hours when every detail is sourced individually. Researching suppliers, attending consultations, comparing pricing, and reviewing contracts often becomes exhausting. Complete packages dramatically reduce the amount of time needed for decision-making.
Instead of managing dozens of separate conversations, couples can communicate with a central planning team that oversees the entire experience. This streamlined approach allows more energy to be directed towards meaningful moments such as writing vows, spending time with loved ones, and enjoying the engagement period.
Financial Planning Becomes More Predictable
Budget uncertainty is one of the most stressful parts of wedding preparation. Unexpected expenses frequently appear when individual suppliers add delivery fees, overtime charges, or equipment hire costs. Comprehensive wedding packages usually provide clearer pricing structures, helping couples understand exactly what is included from the beginning.
Having a more transparent financial overview reduces the likelihood of unpleasant surprises later in the planning process. Couples can make confident decisions knowing the major elements of the celebration are already accounted for within the package.
Professional Coordination Reduces Last Minute Stress
The final weeks before a wedding can feel particularly intense. Confirming schedules, managing guest numbers, and coordinating suppliers all require careful attention. Complete wedding packages often include experienced coordinators who oversee logistics and ensure every detail is handled properly.
This professional guidance allows couples to remain present and emotionally connected during the lead-up to the ceremony. Rather than responding to phone calls and troubleshooting issues on the wedding morning, they can focus on enjoying the experience with family and friends.
The Essential Features That Elevate a Wedding Package
Venue Design Shapes the Entire Atmosphere
The setting of a wedding influences every aspect of the celebration. A well-designed venue provides more than visual appeal because it also affects comfort, convenience, and the overall guest experience. Many comprehensive packages include ceremony and reception spaces within the same location, creating smoother transitions throughout the day.
Couples often appreciate venues that offer flexible layouts, elegant interiors, and practical amenities. This combination allows the event to feel refined while also remaining comfortable and accessible for guests of all ages.
Catering Creates Lasting Guest Impressions
Food plays a central role in how guests remember a wedding. High-quality catering contributes significantly to the atmosphere of celebration and hospitality. Complete wedding packages frequently include curated dining experiences that align with the style and tone of the event.
Whether the menu focuses on formal dining, shared feasting tables, or modern cocktail service, integrated catering teams work closely with the venue and planners to ensure timing and presentation remain seamless throughout the reception.
Styling and Décor Bring Personality into the Space
Every couple wants their wedding to reflect their relationship and personal style. Thoughtful décor transforms a venue into a meaningful environment filled with warmth and character. Inclusive wedding packages often provide styling services that simplify the creative process while still allowing customisation.
Floral arrangements, lighting, table settings, and ceremony backdrops all contribute to the visual identity of the event. Coordinated styling ensures these details complement one another rather than appearing disconnected or rushed.
Entertainment Maintains the Energy of the Celebration
The atmosphere of a wedding changes dramatically depending on the quality of entertainment. Music guides the emotional rhythm of the day from the ceremony procession to the final dance of the evening. Many wedding packages include entertainment options that suit different styles of celebration.
Professional entertainers understand how to engage guests while adapting to the mood of the event. Their experience helps maintain momentum and creates memorable moments throughout the reception.
How Complete Wedding Experiences Improve Guest Comfort
Simplified Locations Make Travel Easier
Guests appreciate weddings that feel easy to navigate. When ceremonies, receptions, and accommodation are spread across multiple locations, transportation can become complicated and tiring. All-inclusive celebrations often bring these elements together in a single destination, creating a more convenient experience for everyone attending.
Guests can settle into the event without worrying about directions, parking complications, or long travel times between venues. This convenience contributes to a more relaxed and enjoyable atmosphere throughout the day.
Accommodation Options Enhance the Celebration
When accommodation is incorporated into the wedding arrangement, guests can fully immerse themselves in the occasion without rushing home afterwards. This added convenience creates a more leisurely and connected experience, particularly for close family members and friends.
Many couples value the opportunity to continue celebrating with guests after the formal reception concludes. Shared breakfasts, casual gatherings, and extended conversations often become cherished memories connected to the wedding weekend.
Coordinated Timelines Keep the Event Flowing Smoothly
Guests may not always notice careful scheduling, yet they immediately recognise when timing feels disorganised. Delays between ceremony stages, lengthy waits for meals, or inconsistent transitions can affect the energy of the celebration.
Comprehensive wedding packages usually include event coordinators who carefully structure the timeline. Their role ensures each part of the day progresses naturally while maintaining a comfortable pace for guests.
Comfortable Amenities Encourage Relaxation
Thoughtful amenities contribute significantly to guest satisfaction. Climate control, accessible facilities, comfortable seating, and well-designed spaces all influence how people experience the event. Venues included in premium wedding packages often prioritise these details because they understand their importance in creating a positive atmosphere.
When guests feel comfortable and cared for, they are more likely to remain engaged and relaxed throughout the celebration.
Personalisation Still Matters in Inclusive Wedding Experiences
Packages Can Reflect Individual Style
Some couples worry that comprehensive wedding arrangements may feel generic or inflexible. In reality, many modern wedding packages are designed to balance convenience with creative freedom. Couples can often personalise key aspects of the celebration while still benefiting from coordinated planning support.
Colour palettes, floral selections, menu choices, and entertainment preferences can all be tailored to suit the couple’s personality and vision.
Meaningful Details Make Celebrations Memorable
Personal touches often become the moments guests remember most. Handwritten vows, family traditions, customised menus, and sentimental décor elements create emotional depth within the celebration.
Experienced wedding coordinators understand how to incorporate these details into the event without disrupting the overall flow. Their support allows couples to preserve authenticity while avoiding unnecessary planning pressure.
Flexible Styling Creates Distinctive Atmospheres
Wedding aesthetics continue evolving as couples seek celebrations that feel contemporary and unique. Inclusive packages frequently offer styling flexibility that accommodates a variety of preferences, from minimalist elegance to romantic garden-inspired themes.
This adaptability allows couples to create an environment that feels personal while still benefiting from professional guidance and cohesive design.
Tailored Experiences Strengthen Emotional Connection
The most memorable weddings are those that genuinely reflect the relationship being celebrated. Personalised experiences create stronger emotional engagement for both the couple and their guests. Carefully curated moments throughout the ceremony and reception help transform the event from a formal gathering into something deeply meaningful.
When planning professionals collaborate closely with couples, the result is often a celebration that feels both polished and emotionally authentic.
Choosing the Right Wedding Package for Long-Term Satisfaction
Transparency Is Essential from the Beginning
Before committing to any wedding package, couples should carefully review what is included within the arrangement. Clear communication regarding pricing, inclusions, timelines, and optional upgrades helps avoid confusion later in the planning process.
Understanding the full scope of services ensures expectations remain realistic while allowing couples to compare options with confidence.
Experience and Reputation Matter Greatly
A wedding involves emotional significance as well as financial investment. Choosing providers with strong experience and a reliable reputation can make a substantial difference to the overall outcome. Established teams often have proven systems for handling logistics, communication, and unexpected challenges efficiently.
Reading reviews, attending venue tours, and speaking directly with coordinators can provide valuable insight into the level of professionalism offered.
Flexibility Helps Accommodate Changing Needs
Wedding plans occasionally evolve as guest numbers shift or preferences change. Couples should look for packages that allow reasonable flexibility without creating high additional costs.
Adaptable arrangements make it easier to refine details throughout the planning journey while maintaining a sense of control and confidence.
Emotional Comfort Should Guide the Decision
Practical considerations are important, yet emotional comfort also matters when selecting a wedding package. Couples should feel genuinely supported, understood, and respected by the planning team they choose.
Strong communication and trust create a more enjoyable planning experience while reducing unnecessary stress during the lead-up to the celebration.
Frequently Asked Questions
Are all-inclusive wedding packages suitable for smaller weddings?
Yes, many wedding venues offer package options designed specifically for intimate celebrations. Smaller weddings can still benefit from coordinated catering, styling, and planning support while maintaining a more personal atmosphere.
Can couples customise elements within a wedding package?
Most modern wedding packages allow a degree of personalisation. Couples can often adjust décor choices, menu selections, entertainment preferences, and ceremony details to better reflect their style and vision.
Do wedding packages help reduce planning stress?
Comprehensive packages simplify communication and logistics by combining essential services into one organised arrangement. This structure often reduces the pressure associated with managing multiple independent suppliers.
Conclusion
A wedding should feel joyful, memorable, and emotionally fulfilling rather than dominated by stress and endless administrative tasks. Complete wedding arrangements provide couples with the opportunity to enjoy a smoother planning journey while still creating a celebration that reflects their personality and relationship.
By combining professional coordination, thoughtful design, quality catering, and seamless logistics, inclusive wedding experiences create an atmosphere where couples and guests can remain fully present in the moment. The convenience offered through these packages does not remove individuality. Instead, it allows meaningful details to shine without being overshadowed by planning complications.
Choosing a carefully curated wedding package can transform the entire experience from overwhelming to enjoyable. With the right support, couples gain the freedom to focus on what truly matters: celebrating love, connection, and the beginning of a shared future.
Preserving Historic Interiors Through Skilled Heritage Plaster Restoration
Historic buildings carry more than architectural beauty. They represent cultural identity, craftsmanship, community history, and the design traditions of earlier generations.
From grand Victorian homes and heritage-listed public buildings to churches, theatres, and classic commercial properties, older structures often contain decorative plasterwork and traditional wall finishes that cannot easily be recreated using modern construction methods alone.
Over time, however, age, moisture, structural movement, neglect, and environmental exposure can weaken these surfaces and threaten the original character of the building. This is why heritage plaster restoration remains one of the most important parts of preserving historic architecture and maintaining the visual integrity of heritage properties.
Heritage plaster restoration involves repairing, preserving, and recreating traditional plaster surfaces and decorative features within historic buildings. Unlike ordinary plaster repairs, restoration work requires specialised knowledge of older materials, traditional craftsmanship techniques, historical accuracy, and conservation principles.
Skilled restoration specialists carefully repair cracks, restore ornamental mouldings, preserve decorative ceiling details, stabilise ageing walls, and maintain the original appearance of historic interiors while improving structural reliability and long-term durability.
One of the most common questions asked during restoration projects is: What is the restoration element of a heritage building? The restoration element of a heritage building refers to the process of returning damaged or altered parts of the structure to a condition that reflects its original historical appearance and architectural character.
Restoration focuses on preserving authentic materials, maintaining historical design integrity, and carefully repairing or recreating important structural and decorative features without compromising the building’s heritage significance.
Heritage plaster restoration plays a major role in this process because plaster surfaces often contain some of the most visually important details within historic interiors. Decorative cornices, ceiling roses, mouldings, wall textures, arches, columns, and ornamental finishes all contribute to the identity and historical value of heritage buildings.
Without proper restoration, these architectural features may deteriorate beyond repair, resulting in permanent loss of craftsmanship and historical character.
This article explores Heritage Plaster Restoration in detail, explains the restoration element of heritage buildings, discusses traditional plastering techniques and preservation methods, and highlights how careful restoration work protects the cultural, architectural, and historical significance of older properties.
Why Heritage Plaster Restoration Is Important

Historic buildings provide a physical connection to earlier periods of architecture, craftsmanship, and community development. Unlike modern construction, many heritage interiors contain handcrafted plaster features created by skilled artisans using traditional methods and materials that are rarely used today.
Over time, however, heritage plaster naturally deteriorates due to structural movement, moisture intrusion, vibration, ageing materials, and environmental exposure. Cracks may develop in ceilings, decorative mouldings may loosen, and older plaster surfaces may begin separating from underlying structures.
Without proper restoration, these issues can lead to significant structural and visual damage. Once original plasterwork is lost, replacing it authentically becomes far more difficult and expensive.
Heritage plaster restoration helps preserve the historical authenticity of a building while improving stability and functionality. Careful restoration also supports cultural conservation efforts by protecting traditional craftsmanship techniques and architectural details that contribute to the historical identity of the property.
In cities with strong architectural heritage, restoration work also contributes to neighbourhood character, tourism appeal, and long-term property value.
Understanding Heritage Plaster Restoration
Heritage plaster restoration focuses on preserving and repairing traditional plaster features.
Repairing Historic Plaster Surfaces
Damaged walls and ceilings are stabilised and restored carefully.
Preserving Decorative Features
Cornices, mouldings, and ceiling details are maintained authentically.
Matching Original Materials
Restoration uses compatible materials that reflect traditional construction methods.
Protecting Historical Character
Repairs aim to preserve the building’s original visual identity.
What Is the Restoration Element of a Heritage Building
Restoration focuses on returning historic structures to their original appearance and condition.
Preserving Authentic Architectural Features
Original design elements remain protected whenever possible.
Repairing Rather Than Replacing
Conservation prioritises restoration over unnecessary removal.
Maintaining Historical Accuracy
Repairs should reflect the building’s original period and craftsmanship.
Respecting Cultural Significance
Historic buildings often hold important social and architectural value.
Common Types of Heritage Plaster Damage
Historic plaster surfaces face many long-term challenges.
Structural Cracking
Building movement often causes visible plaster cracks.
Water Damage and Moisture Issues
Leaks weaken plaster and decorative surfaces over time.
Surface Delamination
Plaster may separate from the underlying walls or ceilings.
Decorative Moulding Deterioration
Ornamental details can crack, loosen, or break away.
Age-Related Material Weakness
Older plaster naturally weakens after decades of exposure.
Previous Poor Repairs
Incompatible modern repairs may damage the original plaster further.
Traditional Plaster Materials Used in Heritage Buildings
Older plaster systems differ significantly from modern plasterboard construction.
Lime Plaster Systems
Traditional lime plaster was commonly used in historic interiors.
Horsehair Reinforcement
Older plaster often used natural fibres for strength.
Sand and Lime Mixtures
Historic plaster mixtures relied on natural mineral materials.
Handcrafted Decorative Mouldings
Ornamental features were often created manually on-site.
The Importance of Historical Accuracy in Restoration
Authenticity remains one of the most important principles in heritage restoration.
Matching Original Design Styles
Repairs should reflect the building’s architectural period accurately.
Preserving Traditional Craftsmanship
Restoration protects historic construction techniques.
Avoiding Modern Visual Inconsistencies
Incompatible materials may damage the historical appearance.
Maintaining Heritage Value
Authentic restoration supports long-term cultural significance.
Heritage Ceiling Restoration
Ceilings often contain some of the most decorative historic plaster features.
Ceiling Crack Repairs
Structural movement frequently affects older ceilings.
Decorative Ceiling Rose Restoration
Ornamental centrepieces require careful repair techniques.
Cornice and Moulding Repairs
Decorative edges contribute heavily to historic character.
Sagging Ceiling Stabilisation
Loose plaster ceilings may require reinforcement and reattachment.
Decorative Plaster Restoration Techniques
Decorative restoration requires highly specialised skills.
Mould Recreation and Casting
Damaged features may be recreated using moulding techniques.
Hand-Carved Detailing
Artisans may manually repair intricate decorative sections.
Surface Texture Matching
Repairs should blend naturally with original finishes.
Fine Sanding and Refinishing
Final preparation improves visual consistency significantly.
Structural Stabilisation in Heritage Restoration
Preserving plaster often requires addressing structural issues first.
Reinforcing Loose Plaster Sections
Weak surfaces may need stabilisation behind the plaster layer.
Repairing Timber Laths
Traditional lath systems often support historic plaster.
Managing Building Movement
Structural problems should be corrected before cosmetic repairs.
Protecting Fragile Decorative Features
Careful handling prevents additional damage during restoration.
Moisture Problems in Heritage Buildings
Moisture remains one of the greatest threats to historic plaster.
Roof and Plumbing Leaks
Water infiltration weakens plaster surfaces significantly.
Rising Damp Issues
Older buildings often experience moisture movement through walls.
Condensation and Ventilation Problems
Poor airflow may increase long-term deterioration.
Salt and Mineral Damage
Moisture can leave harmful deposits within plaster surfaces.
Heritage Wall Restoration
Historic walls require careful preservation and repair methods.
Surface Crack Repairs
Minor damage should be repaired without removing original material.
Replastering Damaged Sections
Severely weakened areas may require partial replacement.
Matching Historic Textures
Restored walls should maintain the original visual character.
Preserving Decorative Finishes
Paint layers and textures may hold historical significance.
Challenges of Heritage Plaster Restoration
Restoration projects often involve complex technical challenges.
Limited Availability of Traditional Materials
Some historic products are difficult to source today.
Fragile Existing Structures
Older plaster may become highly delicate over time.
Matching Original Craftsmanship
Modern techniques may not replicate historic finishes accurately.
Balancing Preservation and Durability
Restoration must improve stability without damaging authenticity.
Modern Technology in Heritage Restoration
Technology increasingly supports restoration accuracy and efficiency.
Laser Scanning and Surface Mapping
Digital tools help document decorative features precisely.
3D Mould Replication
Technology assists with reproducing damaged ornaments.
Advanced Moisture Detection
Specialised equipment identifies hidden water damage.
Improved Conservation Materials
Modern products support stronger and more compatible repairs.
Heritage Restoration Regulations and Compliance
Many heritage buildings are protected under preservation regulations.
Heritage Overlay Requirements
Certain properties require approval before modifications.
Conservation Standards
Restoration work should follow heritage preservation guidelines.
Documentation and Assessment Processes
Projects may require architectural reporting and approvals.
Protecting Historical Integrity
Regulations help preserve cultural significance long-term.
Why Skilled Heritage Plaster Specialists Matter
Heritage restoration requires far more than standard plastering knowledge.
Understanding Traditional Materials
Specialists know how historic plaster systems behave over time.
Experience With Decorative Features
Complex ornamental work requires specialised craftsmanship.
Preservation-Focused Repair Methods
Conservation prioritises maintaining original materials whenever possible.
Historical Design Knowledge
Experts understand period-specific architectural styles and finishes.
Heritage Restoration and Property Value
Well-restored heritage buildings often hold strong market appeal.
Increased Architectural Prestige
Historic details contribute to a premium property presentation.
Cultural and Historical Importance
Heritage properties often attract specialised buyers.
Long-Term Preservation Benefits
Quality restoration reduces future structural deterioration.
Enhanced Interior Character
Original decorative plasterwork creates a unique visual appeal.
Common Mistakes in Heritage Plaster Restoration
Poor restoration can permanently damage historic interiors.
Using Modern Incompatible Materials
Modern plaster products may trap moisture improperly.
Over-Restoration of Historic Features
Excessive replacement reduces historical authenticity.
Ignoring Structural Problems
Cosmetic repairs alone may fail quickly.
Poor Texture and Colour Matching
Visible inconsistencies reduce restoration quality significantly.
Preventing Future Damage to Heritage Plaster
Preventive maintenance helps preserve historic interiors longer.
Address Moisture Problems Quickly
Water damage should never remain untreated.
Maintain Stable Indoor Conditions
Humidity control reduces long-term deterioration.
Schedule Regular Inspections
Early repairs prevent larger restoration costs later.
Protect Decorative Features Carefully
Fragile plaster details require ongoing care and maintenance.
Future Trends in Heritage Plaster Restoration
Restoration practices continue evolving alongside conservation technology.
Sustainable Restoration Materials
Eco-friendly lime products continue gaining popularity.
Advanced Conservation Techniques
Improved repair systems support longer-lasting preservation.
Greater Focus on Historical Accuracy
Authentic restoration remains increasingly valued.
Skilled Trade Preservation
Traditional plaster craftsmanship continues to receive renewed appreciation.
Frequently Asked Questions
What is the restoration element of a heritage building?
The restoration element involves returning damaged or altered parts of a historic building to a condition that reflects its original architectural appearance and historical character.
Why is heritage plaster restoration important?
Heritage plaster restoration preserves historic craftsmanship, architectural detail, structural stability, and cultural significance.
Can damaged decorative plaster be repaired?
Yes, many decorative plaster features, such as cornices, mouldings, and ceiling roses, can often be repaired or recreated by skilled restoration specialists.
Conclusion
Heritage plaster restoration plays a vital role in preserving the beauty, craftsmanship, and historical identity of older buildings. Decorative plaster features, traditional wall finishes, ornate ceilings, and handcrafted mouldings represent architectural traditions that deserve careful protection and professional restoration.
Understanding the restoration element of a heritage building also highlights the importance of preserving authenticity while improving structural stability and long-term durability. Restoration is not simply about repairing damage. It is about respecting the original design, protecting historical significance, and ensuring future generations can continue appreciating the craftsmanship and cultural value of heritage architecture.
A professionally restored heritage plaster interior offers far more than visual beauty alone. It preserves history, strengthens architectural character, supports cultural conservation, and maintains the timeless elegance that makes heritage buildings such important parts of the built environment.
Unleashing Her Power: What It Takes to Step into the Women’s Boxing Arena
Boxing has long been perceived as one of the most demanding physical and mental sports, requiring relentless discipline, resilience, and heart. For women stepping into this world, the journey holds its own distinct challenges and profound rewards. The preparation is not simply about strength and speed; it’s about purpose, determination and understanding the multifaceted requirements that shape a well‑rounded female boxer.
Women who commit to boxing often find themselves not only forging athletic prowess but also building confidence, strategic thinking, and emotional resilience in ways that extend far beyond the ring.
The image of a boxer is often associated with brute force and aggression, but there is a rich depth of nuance in the sport that appeals to many women worldwide. Training demands technique, tactical awareness, and a commitment to consistent improvement.
Women who enter this realm discover that boxing fosters empowerment through skill mastery and personal achievement. As they refine their punches and defensive manoeuvres, they also develop a powerful framework of self‑belief and inner strength.
Boxing for women is a pursuit that challenges preconceived limits. It requires a combination of physical conditioning, mental preparedness and structured guidance from coaches and support systems. The sport can transform the way women view their bodies, their capabilities and their capacity for endurance under pressure.
Whether they aspire to compete at an advanced level or simply wish to enhance fitness and confidence, women aspiring to box must understand and meet certain foundational requirements that enable safe and successful participation.
Embracing the art of boxing calls for more than the willingness to step into the ring; it involves a commitment to holistic development as an athlete. From mastering essential techniques to recognising the importance of injury prevention and psychological readiness, women who pursue boxing embark on a journey that demands respect for the craft.
In this exploration of what it takes to be a female boxer, we will unpack the key requirements that support women in achieving their ambitions within this dynamic sport.

Physical Fitness Foundation
Strength and Conditioning Training
Strength and conditioning are at the heart of boxing performance. Women entering this sport must cultivate muscle endurance, explosive power and overall body strength to deliver impactful punches and sustain high‑intensity rounds. Conditioning drills often include resistance training, plyometrics and bodyweight exercises tailored to enhance functional strength.
A robust core and lower body power are particularly important, as they contribute to balance, stability and the transfer of force during striking combinations. Conditioning also involves cardiovascular endurance to maintain stamina throughout sparring sessions and competitive bouts.
Cardiovascular Endurance
Boxing matches are gruelling, requiring sustained energy over multiple rounds. Women preparing for the sport engage in cardiovascular workouts such as running, skipping rope and high‑intensity interval training. These exercises improve heart and lung efficiency, ensuring that athletes can maintain peak performance without succumbing to early fatigue.
Conditioning sessions must be structured progressively, increasing in intensity and duration as the boxer’s fitness improves. This adaptation builds the heart’s capacity to support prolonged physical stress and boosts recovery between high-output efforts.
Flexibility and Mobility
Flexibility is often undervalued in combat sports, but it plays a critical role in injury prevention and movement fluidity. Women must integrate stretching routines and mobility drills into their training to maintain joint health and range of motion.
A flexible athlete can execute defensive manoeuvres and evasive footwork more effectively, reducing the risk of strain or muscle imbalance. Incorporating practices such as dynamic stretching before workouts and static stretching post‑training helps condition muscles for both performance and recovery, ultimately contributing to long‑term athletic sustainability.
Technical Skill Development
Mastering Boxing Fundamentals
Technical proficiency in boxing hinges on mastering core skills. Women embarking on this journey must learn proper stance, guard position, footwork and punching mechanics. These fundamentals are essential to form a solid foundation before progressing to more complex strategies.
Coaches typically break down each aspect, focusing on alignment, balance and efficient movement patterns. A correct stance enables defensive readiness and facilitates quick transitions between offence and defence. Punching mechanics emphasise precision and technique, reducing wasted energy while increasing impact.
Defensive Techniques and Ring IQ
An effective boxer is as adept at defence as attack. Women must practice slipping, ducking, blocking and parrying to protect themselves during exchanges. Defensive training is not instinctive; it results from repetitive drills that reinforce timing and spatial awareness.
Developing ring intelligence (ring IQ) allows a boxer to anticipate an opponent’s actions, manage distance and make tactical decisions under pressure. This mental component of the sport complements physical execution and differentiates skilled athletes from novices.
Sparring and Practical Application
Sparring is a controlled form of practice that simulates real match conditions. For women aspiring to sharpen their skills, it provides the opportunity to apply learned techniques against a live partner. This form of training exposes athletes to stimulus unpredictability, requiring them to adapt and respond effectively.
Coaches monitor sparring sessions closely to ensure safety and constructive feedback. Frequent sparring helps boxers refine timing, rhythm and the ability to read an opponent. It also builds confidence in implementing a strategy in an environment that bridges training to competition.
Psychological Preparedness
Mental Toughness and Focus
Boxing is as much psychological as it is physical. Women must cultivate mental toughness to navigate the pressures of training and performance. This includes the ability to stay composed under stress, maintain focus during long sessions and recover from setbacks both in training and competition.
Mental strength supports perseverance, resilience and the discipline necessary to adhere to demanding training schedules. Techniques such as visualisation, goal‑setting and mindfulness can enhance an athlete’s ability to manage stress and optimise performance.
Confidence and Self‑Belief
Confidence is foundational to success in the ring. Women who box benefit from internalising a sense of self‑belief that empowers them to trust their skills and push their boundaries. This confidence develops gradually through consistent practice, constructive reinforcement from coaches and small achievements that build momentum.
Recognising personal progress fosters a mindset that views challenges as opportunities for growth rather than obstacles. Such psychological fortitude translates into bold decision‑making during sparring and competition.
Managing Competitive Pressure
The competitive landscape amplifies psychological demands. Women must learn to regulate emotions and sustain concentration amidst external pressures. Performance anxiety is a common experience, and developing coping strategies is crucial.
Techniques such as controlled breathing, positive self‑talk and pre‑fight routines aid in stabilising nerves. Mental preparation ensures that athletes approach competition with clarity and a focused mindset, enabling them to execute strategy without hesitation.
Nutritional and Recovery Requirements
Balanced Nutrition for Performance
Nutrition fuels performance, recovery and overall health. Women engaged in boxing must prioritise a balanced diet rich in macronutrients that support energy needs, muscle repair and immune function. Protein intake is vital for muscle recovery, while carbohydrates supply readily available energy for high‑intensity workouts. Healthy fats contribute to hormonal balance and sustained energy.
Hydration is equally important; sufficient fluid intake supports cognitive function, thermoregulation and physical endurance. Nutrition plans may be tailored to individual needs depending on training load, body composition goals and metabolic demands.
Rest and Sleep
Recovery is a fundamental yet often overlooked component of athletic training. Women who box must ensure they get adequate rest and quality sleep to allow physiological systems to repair and adapt. Sleep facilitates muscle recovery, cognitive processing and hormonal regulation—elements essential for peak performance.
Without sufficient sleep, athletes are prone to fatigue, decreased concentration and increased injury risk. Structured rest periods between intense training sessions prevent overtraining and foster long‑term progression.
Injury Prevention and Care
Boxing places significant strain on the body, and women must be vigilant about injury prevention. Proper warm‑ups, cool‑downs and strength training that support joint stability are critical. Attention to technique reduces the likelihood of acute injuries such as sprains and chronic issues like tendonitis.
When injuries occur, prompt and appropriate care ensures that recovery does not compromise long‑term goals. Women should consult medical professionals and rehabilitative specialists when necessary, integrating therapeutic interventions into their training routines.
Equipment and Safety Standards
Protective Gear Essentials
Safety is paramount in boxing, and women must equip themselves with high‑quality protective gear. Boxing gloves of suitable weight and fit protect both the wearer and their training partner during sparring and pad work. Hand wraps stabilise the wrist and knuckles, reducing the risk of fractures and soft tissue damage.
Mouthguards safeguard oral structures, while headgear offers additional protection during contact sessions. Footwear designed for boxing supports agility and balance while reducing the likelihood of slips or ankle injuries. Investing in proper equipment is not optional; it is a requirement for safe and effective training.
Training Environment and Supervision
The training environment significantly influences safety and development. Women should train in spaces that uphold cleanliness, adequate spacing and access to emergency support if needed. Working under the supervision of experienced coaches ensures that techniques are taught correctly and that safety protocols are enforced.
Coaches identify areas of improvement, correct mistakes and help athletes progress systematically. A supportive training environment also fosters camaraderie, motivation and accountability—elements that contribute to sustained commitment.
Regular Assessment and Monitoring
Continuous assessment allows women to track progress and adjust training plans accordingly. Monitoring fitness levels, technical improvements, and overall well‑being helps identify areas that require attention. Coaches may conduct periodic evaluations, adjusting drills, conditioning loads, and skill focus to align with athlete development.
Comprehensive assessment also includes monitoring signs of burnout or excessive strain, ensuring that training enhances performance without compromising health.
Frequently Asked Questions
What basic physical attributes should a woman have before starting boxing?
Women do not need extraordinary physical attributes to begin boxing, but a reasonable level of fitness and willingness to build strength, endurance and coordination are important. Starting with foundational fitness and gradually increasing intensity allows athletes to adapt safely to the sport’s demands.
How long does it take to become competent at boxing?
Competency depends on consistency, natural aptitude, quality of coaching and training frequency. Some women develop fundamental skills within a few months of regular practice, while achieving advanced proficiency may take years of dedicated training and competition experience.
Is boxing suitable for women of all ages?
Boxing can be adapted for women across a broad age range, provided that training is tailored to individual fitness levels, health considerations and personal goals. Beginners should start with basic conditioning and technique under qualified supervision, progressively building skill and confidence.
Conclusion
The path to becoming a successful female boxer is both rigorous and rewarding. It encompasses physical conditioning, technical mastery, psychological readiness, proper nutrition and a commitment to safety. Women who venture into boxing discover that the sport not only challenges their bodies but also transforms their mindset and self‑perception.
By embracing the requirements necessary for effective participation, aspiring boxers position themselves for continual growth, resilience and achievement within this demanding discipline. The journey is a testament to the strength, focus and determination that define the heart of a boxer.
Organised Garage Living Starts With Smarter Shelving Solutions for Australian Homes
A garage is often one of the hardest-working spaces in any Australian home. It stores vehicles, tools, gardening equipment, sporting gear, camping supplies, seasonal decorations, cleaning products, automotive accessories, and countless household items that do not fit comfortably inside the house.
Over time, these belongings can slowly take over the garage, leaving homeowners with crowded floors, overflowing corners, and limited movement space. What was once meant to be a practical and accessible area can quickly become disorganised and frustrating to manage. This is why garage shelving in Australia has become one of the most effective ways to create cleaner, safer, and more functional storage environments.
Garage shelving provides structured storage that helps homeowners organise items vertically rather than allowing clutter to spread across the floor. Well-designed shelving systems create designated storage areas that improve accessibility, maximise space, and make garages easier to maintain.
In Australian households where outdoor lifestyles are common, garages often need to store everything from surfboards and bicycles to power tools and recreational equipment. Proper shelving systems help accommodate these changing storage needs while keeping the garage organised and visually tidy.
One of the most common questions homeowners ask while planning garage upgrades is: What is garage shelving? Garage shelving refers to storage systems specifically designed for garage environments to hold tools, equipment, containers, household supplies, and other items in an organised and accessible manner.
These shelves may be wall-mounted, freestanding, ceiling-mounted, modular, or custom-built, depending on the layout and purpose of the garage. Garage shelving is usually designed to support heavier loads and harsher conditions than standard indoor shelving because garages often experience moisture, dust, temperature changes, and frequent use.
Modern garage shelving systems are no longer viewed as simple utility structures. Homeowners increasingly expect garages to feel organised, practical, and visually connected to the rest of the home. As a result, shelving systems now combine durability with design, offering cleaner layouts, adjustable storage options, premium finishes, and highly functional configurations tailored to individual lifestyles.
This article explores Garage Shelving Australia in detail, explains what garage shelving is, discusses different shelving systems and materials, and highlights how well-designed shelving can improve garage organisation, efficiency, and long-term functionality.
Understanding Garage Shelving

Garage shelving is a structured storage system designed specifically for storing items inside a garage environment. Unlike ordinary household shelves, garage shelving is typically built to handle heavier equipment, larger storage containers, and more demanding conditions.
Many homeowners underestimate how quickly garage clutter develops. Tools are often left on workbenches, gardening equipment collects in corners, and sports gear gradually takes over floor space. Without a proper storage structure, garages become difficult to clean and less functional for everyday use.
Shelving solves this problem by creating organised storage zones. Different shelves can be dedicated to different categories, such as automotive supplies, power tools, seasonal decorations, camping gear, or cleaning products. Organised shelving systems improve visibility and allow homeowners to locate items quickly without searching through piles of boxes or overcrowded corners.
Garage shelving systems also help preserve valuable floor space. By storing items vertically, garages feel larger, safer, and easier to navigate. This becomes especially important in smaller Australian garages where every square metre matters.
As homeowners increasingly prioritise organisation and efficient use of space, garage shelving continues to become one of the most practical investments in modern garage design.
What Is Garage Shelving
Garage shelving refers to storage units specifically designed for use inside garages.
Designed for Heavy-Duty Storage
Garage shelves are built to support heavier loads than typical household furniture.
This makes them suitable for tools, containers, automotive supplies, and outdoor equipment.
Available in Different Styles
Shelving systems may be wall-mounted, freestanding, overhead, or modular.
Built for Garage Conditions
Garage shelving materials are often moisture-resistant and highly durable.
Supports Better Organisation
Shelves create structured storage zones that improve accessibility and efficiency.
Why Garage Shelving Is Important in Australian Homes
Australian garages often support a wide range of storage needs.
Outdoor Lifestyle Storage Requirements
Many Australians store camping gear, bicycles, surfboards, and sports equipment in garages.
Household Overflow Storage
Garages frequently hold cleaning products, pantry overflow, and seasonal decorations.
Workshop and Hobby Areas
Garages often function as DIY workspaces and hobby stations.
Better Use of Limited Space
Shelving helps maximise storage without expanding the physical size of the garage.
Freestanding Garage Shelving Systems
Freestanding shelves remain highly popular because of their simplicity and flexibility.
Easy Installation
These systems usually require minimal wall attachment.
Portable Storage Flexibility
Shelves can be repositioned easily as storage needs change.
Multi-Purpose Functionality
Freestanding units support tools, storage bins, and household supplies effectively.
Suitable for Renters
Portable systems work well for homeowners who want non-permanent solutions.
Wall-Mounted Garage Shelving
Wall-mounted systems maximise vertical storage efficiently.
Preserving Floor Space
Wall shelves create more open movement areas.
Cleaner Garage Appearance
Elevated storage creates visually organised layouts.
Better Accessibility
Frequently used tools remain easier to reach.
Strong Weight Distribution
Properly mounted systems safely support heavier equipment.
Heavy-Duty Industrial Garage Shelving
Industrial shelving is designed for demanding storage environments.
Steel Construction Durability
Heavy-duty steel shelves resist bending and damage over time.
High Weight Capacity
Industrial systems safely hold bulky tools and equipment.
Workshop Organisation Benefits
These shelves support efficient tool and machinery storage.
Long-Term Structural Reliability
Industrial shelving performs well under continuous use.
Modular Garage Shelving Systems
Modular systems offer flexibility and adaptability.
Expandable Storage Layouts
Additional shelves and accessories can be added gradually.
Adjustable Shelf Heights
Flexible shelf spacing supports changing storage needs.
Combination Storage Features
Modular systems often integrate hooks, cabinets, and baskets.
Future-Proof Garage Organisation
Adaptable systems evolve alongside household routines.
Wooden Garage Shelving Systems
Wood shelving remains a popular option for custom garage layouts.
Affordable DIY Construction
Timber shelves can be relatively inexpensive to build.
Custom Design Possibilities
Wood shelves can be tailored to exact garage dimensions.
Traditional Garage Aesthetics
Timber creates warmer and more natural visual appeal.
Easy Repairs and Modifications
Wood systems are relatively simple to adjust later.
Metal Garage Shelving Systems
Metal shelves provide excellent durability and strength.
Moisture Resistance Benefits
Coated metal systems resist corrosion effectively.
Industrial Visual Style
Metal shelving creates clean and modern workshop aesthetics.
Heavy Tool Support
Metal systems safely hold large workshop equipment.
Easy Cleaning and Maintenance
Smooth metal surfaces are easy to maintain.
Garage Shelving for Sports Equipment
Sports gear often requires highly organised storage systems.
Bicycle Storage Integration
Shelves and wall mounts support cycling equipment effectively.
Ball and Accessory Organisation
Storage bins simplify sports equipment management.
Protective Gear Storage
Helmets and pads remain easier to access and organise.
Seasonal Activity Rotation
Flexible shelving supports changing recreational needs.
Shelving Solutions for Gardening Equipment
Gardening supplies benefit greatly from structured organisation.
Potting Supply Storage
Shelves improve organisation for gardening accessories.
Fertiliser and Chemical Storage
Dedicated shelves improve safety and accessibility.
Hose and Irrigation Equipment Organisation
Proper storage reduces tangling and clutter.
Outdoor Tool Management
Shelving systems complement wall hooks for larger tools.
Garage Shelving for Family Organisation
Family garages often require flexible and practical layouts.
Children’s Equipment Storage
Scooters, toys, and sports gear remain easier to manage.
Seasonal Decoration Shelving
Dedicated storage simplifies holiday organisation.
Cleaning Supply Zones
Shelving improves household product accessibility.
Multi-Purpose Storage Layouts
Different shelves can support different family activities.
Ceiling-Mounted Garage Shelving
Ceiling systems maximise unused overhead space.
Seasonal Item Storage
Overhead shelves work well for rarely used belongings.
Large Storage Bin Management
Bulky containers can be stored above floor level.
Better Floor and Wall Organisation
Ceiling systems preserve lower storage areas.
Safe Weight Distribution
Proper installation is essential for safety.
Choosing the Right Garage Shelving Material
Material selection affects durability and long-term performance.
Powder-Coated Steel
Steel systems provide excellent strength and longevity.
Aluminium Shelving
Lightweight aluminium resists corrosion effectively.
Plywood Shelving
Plywood offers affordability and DIY flexibility.
Plastic Shelving Units
Plastic systems work well for lighter storage needs.
Garage Shelving and Garage Design
Shelving strongly affects both functionality and aesthetics.
Coordinated Storage Layouts
Balanced shelving creates cleaner garage interiors.
Matching Colours and Finishes
Visual consistency improves the garage’s appearance.
Open and Closed Storage Balance
Combining shelves with cabinets improves organisation.
Lighting and Shelf Visibility
Good lighting enhances accessibility and presentation.
Common Mistakes When Installing Garage Shelving
Poor planning may reduce storage efficiency.
Overloading Shelves
Exceeding weight limits creates safety risks.
Ignoring Vertical Space
Unused walls reduce storage potential.
Poor Accessibility Planning
Frequently used items should remain easy to reach.
Weak Mounting Installation
Improperly secured shelves may become unstable.
Budget-Friendly Garage Shelving Ideas
Effective garage organisation does not always require expensive systems.
DIY Timber Shelves
Homemade shelving can reduce costs significantly.
Repurposed Household Furniture
Old cabinets and shelves can often be adapted for garage use.
Basic Wall Bracket Systems
Simple wall shelves provide excellent storage value.
Expandable Storage Planning
Garage shelving can grow gradually over time.
Safety Considerations for Garage Shelving
Safety should always remain a priority.
Secure Shelf Mounting
Heavy shelves should always be anchored properly.
Proper Weight Distribution
Weight should be balanced evenly across shelving units.
Safe Chemical Storage
Hazardous materials should remain organised and secure.
Preserving Clear Walkways
Shelving layouts should not block movement areas.
Long-Term Benefits of Garage Shelving
Well-designed shelving systems provide lasting household advantages.
Faster Daily Organisation
Stored items become easier to locate quickly.
Improved Equipment Protection
Proper shelving reduces accidental damage.
Better Garage Cleanliness
Clear floors simplify maintenance and cleaning.
Enhanced Property Appeal
Organised garages contribute positively to home presentation.
Future Trends in Garage Shelving Australia
Garage storage design continues evolving alongside modern lifestyles.
Minimalist Garage Layouts
Simple and uncluttered aesthetics continue growing in popularity.
Sustainable Storage Materials
Eco-friendly shelving products attract increasing interest.
Smart Garage Storage Systems
Technology-integrated storage solutions are becoming more common.
Luxury Garage Interiors
Premium garage organisation continues expanding in popularity.
Frequently Asked Questions
What is garage shelving?
Garage shelving refers to storage systems specifically designed for garage environments to organise tools, equipment, storage bins, and household items efficiently.
What type of shelving is best for garages?
The best shelving depends on storage needs, but heavy-duty steel shelves, modular systems, and wall-mounted shelving are among the most popular options.
Why is garage shelving important?
Garage shelving improves organisation, maximises storage capacity, protects equipment, and creates cleaner and more functional garage environments.
Conclusion
Garage shelving has become one of the most practical and valuable storage solutions for Australian homeowners seeking cleaner, safer, and more organised garages. By transforming unused wall and vertical space into structured storage zones, shelving systems help reduce clutter while improving accessibility and functionality.
Understanding what garage shelving is also helps homeowners choose systems that better support their specific storage requirements and daily routines. Whether using heavy-duty industrial shelves, modular wall systems, freestanding units, or custom-built timber shelving, the right storage solution can significantly improve the way a garage functions.
A thoughtfully designed garage shelving system does more than store belongings. It supports household organisation, protects valuable equipment, improves efficiency, and creates a more visually organised environment that feels easier and more enjoyable to use every day.